
uBuntuからGitHubに接続してみました。 パソコンを入れ替えたりした時の為の備忘録として載せておきます。 また、Gitのよく使うコマンド一覧も載せておきます。
GitHubアカウントがない場合は、先にGithubアカウントを作っておいてくださいね。
最近、UdemyのGitHub講座受けました。 この講座めちゃくちゃわかりやすく、GitHubを始める時に見ると、多分2〜3日で使えるようになると思います。『Git: もう怖くないGit!チーム開発で必要なGitを完全マスター』 私も色々調べてメモしてきたのですが、この講座を安い時に買って見るのがGitHub習得の近道と思います。
公開鍵と秘密鍵を作成
- ssh-keygenの1コマンドで公開鍵と秘密鍵の両方が生成されます。
- 暗号化はrsaは安全でなく、ed25519がいいと聞いたので、ed25519を指定して、githubに登録しているPrimaryメールアドレスも指定して、ssh-keygenをします。
- ファイル名を聞いてくるので、私の場合、他のssh通信で、id_ed25519というファイル名を使っているので、『id_ed25519.github』と入力しました。
- githubに接続する時に聞かれるパスフレーズを2回入力します。
- これで、~/.ssh/ディレクトリ下に、 秘密鍵のid_ed25519.githubと公開鍵の id_ed25519.github.pubの2つのファイルが出来ました。
$ cd ~/.ssh
$ ssh-keygen -t ed25519 -C your_email@example.com
Generating public/private ed25519 key pair.
Enter file in which to save the key (/home/ichiri/.ssh/id_ed25519): id_ed25519.github
Enter passphrase (empty for no passphrase): (パスフレーズを入力する)
Enter same passphrase again:          (同じパスフレーズをもう一度入力する)
Your identification has been saved in id_ed25519.github
Your public key has been saved in id_ed25519.github.pub
The key fingerprint is:
SHA256:KT8S9n4Ak9z00/ozVPxOkUthDHl/wv5cO2wHsMBLVJg j.ichiri@gmail.com
The key's randomart image is:
+--[ED25519 256]--+
|           +..+  |
|        . E  . = |
|     . + + . oo +|
|      = ..* o =+o|
|      +oS. = =.o+|
|     . =. o o o.+|
|      . +. o  .*o|
|       o .. +  ==|
|        ..   o. o|
+----[SHA256]-----+
 $ ls -la ~/.ssh/*.github*
-rw------- 1 ichiri ichiri 464  1月 18 14:27 /home/ichiri/.ssh/id_ed25519.github
-rw-r--r-- 1 ichiri ichiri 100  1月 18 14:27 /home/ichiri/.ssh/id_ed25519.github.pub
ssh-agent(openSSH)に秘密鍵を登録
$ cd ~/.ssh

//秘密鍵を追加。 鍵生成時に入力したパスフレーズを入力。
$ ssh-add id_ed25519_h670.github
Enter passphrase for id_ed25519.github:
Identity added: id_ed25519.github (your_e-mail@example.com)

//追加されたかを確認
$ ssh-add -l
256 SHA256:UHL9ML+BOuggtPQkLP6YowBVgiA2cm3TZwc2uvVb42o your_e-mail@example.com (ED25519)
公開鍵の準備
公開鍵の中身をGithubに貼り付けるので、用意しておく。 catコマンドで表示して、マウスで全部選択して、Ctrl+Shift+Cでコピーできる。(*以下の公開鍵の内容は例)
$ cat ~/.ssh/id_ed25519.github.pub
ssh-ed25519 AAA..........................1lZDI1NTE5AAAAIMlNzYqa205lMK4D+EpxVKxtat5Labn+jr5HICLVNkoT  your_e-mail@example.com
Githubの設定
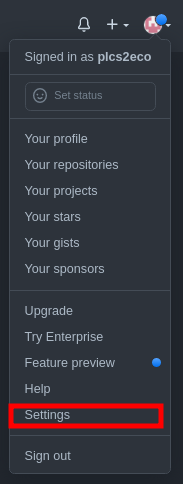
右上のアイコンをクリックしてSetting(設定)を選択する。
左のメニューからSSH and GPG keysを選択する。

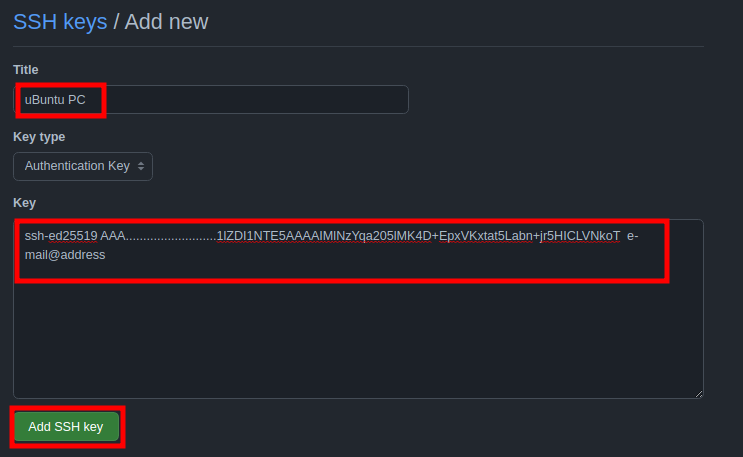
『New SSH key』を選択。

- Titleに分かりやすいタイトル名を入れておく。
- 先程catコマンドで表示した公開鍵の内容を、keyに全て貼り付ける。
- 『Add SSH key』をクリック。
接続チェック
ここまでできたら以下コマンドでgithubに接続してみる。 yes/noを聞かれたら『yes』と入力。 Hi (your account名)! You’ve successfully authenticated, but GitHub does not provide shell access. と返ってきたら成功です。
$ ssh -T git@github.com

The authenticity of host 'github.com (20.27.177.113)' can't be established.
ECDSA key fingerprint is SHA256:p2QAMXNIC1TJYWeIOttrVc98/R1BUFWu3/LiyKgUfQM.
Are you sure you want to continue connecting (yes/no/[fingerprint])? yes
Warning: Permanently added 'github.com,20.27.177.113' (ECDSA) to the list of known hosts.
Hi (your account名)! You've successfully authenticated, but GitHub does not provide shell access.
~/.ssh/configを設定
更に便利にVScodeでも簡単に接続出来るように、~/.ssh/configに以下設定を追加します。
Host github github.com
  HostName github.com
  IdentityFile ~/.ssh/id_ed25519.github  //<---ここに自分の秘密鍵のパス含んだファイル名記入
  User git
~/.ssh/configにHostを登録しておくと、VScodeにも登録したリストが表示され、リストを選択すると簡単にssh接続できます。
Host名で接続チェック
Hostのgithubで簡単に接続できます。 2回目以降は『Hi…』しか表示されません。
$ ssh -T github

Hi (your account名)! You've successfully authenticated, but GitHub does not provide shell access.
リポジトリを作って試してみる
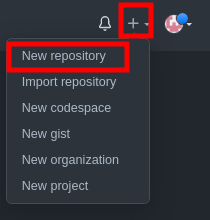
- 画面右側の『+』をクリックして、
- 『New repository』を選択する。
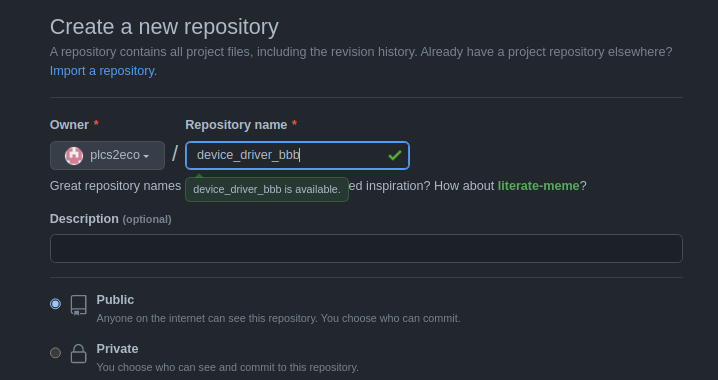
Repository nameにリポジトリ名を入力して『Create repository』をクリック。 この時、既に同じリポジトリ名があれば、作成出来ないので今まで作ったことのないリポジトリ名を入力する。
下のような画面が表示されます。 真ん中のコマンドラインで新規リポジトリをする方法を参考に進めてみました。
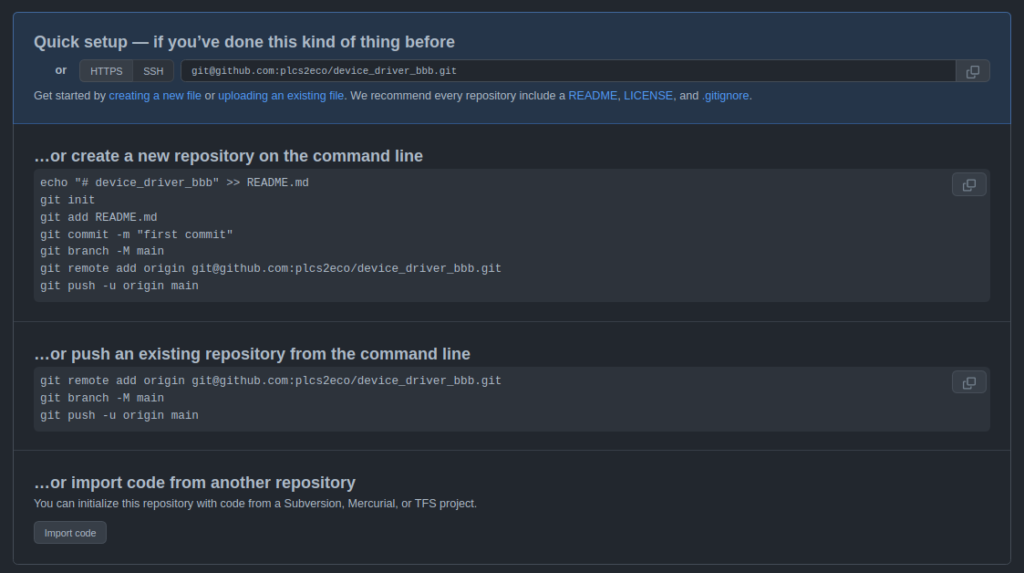
$ cd ~/test/drivers           // githubのRepositoryと連携したいディレクトリに移動して
$ git init                    // gitが使えるように初期化
                              // 以下2行は登録
$ git config --global --add safe.directory ${PWD}  // ${PWD}で現在のディレクトリが登録されます。
$ git config --global user.name "user_name" githubと同じユーザー名にする
$ git config --global user.email "your_email@example.com"
$ touch ichiri.txt             // 何かファイルを作って
$ git add ichiri.txt           // ローカルPC Gitリポ領域前段にファイルをaddして
$ git commit -m "first commit, ichiri.txt"  //ローカルPC Gitリポ領域に正式に送り込んで
$ git branch -M main           // mainという名前のbranch名で
                               // 以下コマンドでgithubに転送前段に登録して
$ git remote add origin git@github.com:plcs2eco/device_driver_bbb.git
($ git remote add origin https://github.com/plcs2eco/device_driver_bbb.git でもOK)
$ git push -u origin main      // pushで転送
Enumerating objects: 3, done.
Counting objects: 100% (3/3), done.
Writing objects: 100% (3/3), 223 bytes | 18.00 KiB/s, done.
Total 3 (delta 0), reused 0 (delta 0)
To github.com:plcs2eco/device_driver_bbb.git
 * [new branch]      main -> main
Branch 'main' set up to track remote branch 'main' from 'origin'.
Githubに行き、先程作った『device_driver_bbb』Repositoryに入ってみると、ichiri.txtがちゃんと掲載されています。
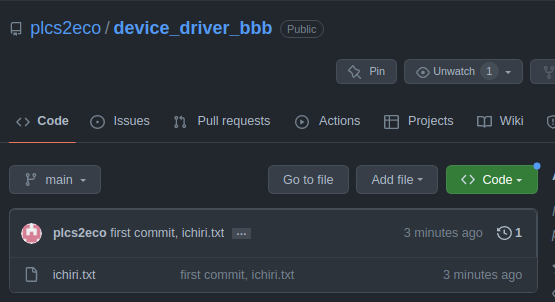
めでたしめでたし。 これでちょっと進めてみます。
GitとGithubの違い
Gitはコマンドラインで動作するリビジョン管理ツール。 ローカルでもサーバーでも動作する。
GithubはGitをベースに使って、GUI化してあるのと、いろいろな付加機能を付けている。 GitLabもGitHub同様、GitをベースにGUI化+付加機能。 GitHubとGitLab違いは、GitLabはOSSなので、無償で家のサーバーに入れて使うことが出来ます。
よく使うGitコマンド一覧
物忘れの激しい私の備忘録として載せておきます。
以下< >の部分は、< >を含まず正しい値に書き換える。
git --version
git config --global user.name <user_name>
git config --global user.email <email_address>
git config --list

git init                //repo新規作成
git clone <remote_repo_url>   //repoをコピー
git gc                  //garbage collection repoを最適化
git pull                //remote repoの変更点をlocal repoにdownload
git pull origin <remote_branch_name> //remote repoのbranchをlocal repoにdownload
git pull origin master  //最初は<remote_branch_name>はmasterになっている
git push <リモート名> <ブランチ名> //ローカルリポの変更点をリモートリポにupload
git add <file_name>    //commit対象のファイルをindex stateに追加
git add <dir_name>     //commit対象のディレクトリをindex stateに追加
git add .          //全体をindex stateに追加
git add -i              //stageの内容確認。 qでexit。
git resttore file_name  //指定したファイルをgit add に入っている状態に戻す
git restore --staged .  //間違えてgit add . で./node_modulesも全stageにaddしたファイルを全て取り消す。
git commit -m "<commit_message>"  //変更されたファイルをcommit(local repoに変更内容を入れ込む) メッセージを入れないとcommitできない。
git commit --amend  //直前のコミット取り消し。 ただしPushしてしまったら、絶対にamendしないこと。
git commit --amend -m "<commit_message>"  //直前のcommitのメッセジ内容を全て置換
git commit -v           //変更内容を確認できる

//その後、上記のgit commit --amend -m ""でそのedit部のメッセージを変更。
//--skipしたら最新のソースコードが消えて、以前のソースコードに変わってしまった。
git reset    //直前のcommit取消
git reset --hard 'HEAD@{#}'   //index stateの状態をHEADの状態にreset。間違えてgit addを一括取り消す場合など。
                               //working treeはresetされないので続けて作業ができる。
                               //#に対象のHEAD番号を入れる。
git revert                 //特定のcommit取消。 しかし履歴は残る。
git tag                    //commitにtagを付ける
git log                    //commit履歴表示(commit id含む)
git log -p file_name       //ファイル名を指定知って差分表示 j,kで上下移動。 qで閲覧終了。
git log -n <コミット数>      //表示するコミット数を制限する
git status                  //working tree内の差分ファイル表示。 変更したファイル確認。
git diff                    //working treeとgit addしたファイルの差分表示
git diff --staged           // git addとgit commitとの差分表示
git diff --cached           //index stateに追加済みでcommitに入る予定の変更箇所の確認。
git rm <ファイル名>           // 指定したファイルをcommit, add , work treeから全て削除
git rm <ディレクトリ名>        // 指定したディレクトリをcommit, add , work treeから全て削除
git rm --cached <ファイル名>  // 指定したファイルをcommit, add からて削除。 work treeは残す。
git reset HEAD <ファイル名>   // git rmで間違って削除したファイルを復活。下のchekoutと一緒に使う。
git checkout <ファイル名>
git mv <旧ファイル名> <新ファイル名>   //ファイル移動、commit,add,work treeの全てファイル名変更
git stash save "<stash_message>"   //working treeの変更を一時的に退避。変更を破棄も、commitも保存もしたくない場合に使用。
git stash save -u "<stash_message>"//新しく作成したファイルも退避
git stash list                 //stash一覧
git stash pop stash@{<stash#>} //stash#を指定して一時退避した作業を戻す
git branch                     //branch作成・一覧表示
git branch -a                  //branch作成・一覧表示
git branch -u
git switch                     //branchの移動(試験的に追加)
git checkout <dest_branch>     //branch移動
got checkout -- <ファイル名>      //ステージを取り消しworking treeに戻すコマンド。
got checkout -- <ディレクトリ名>   //ディレクトリの変更取り消し
git checkout -- .                //変更を一括削除。
git checkout -b <new_branch_name>  //新規branchを作成しそのbranchに移動する。上流のbranchは作れない。
got reset HEAD <ファイル名>      //コミットを取り消しステージ内に戻すコマンド。
got reset HEAD <ディレクトリ名>   //ディレクトリの変更取り消し
git reset HEAD .                //working tree内の変更をstageの状態に戻すコマンド。 変更を一括削除。
git reset --hard HEAD@{3}  //
git merge    //別のbranchから変更点merge
git rebase   //複数branchを一つにまとめる 使用には注意が必要
GIT rebase -i HEAD~3  //直近3つのコミットの変更
//git rebase -i HEAD~3 を実行して、立ち上がったエディタで、メッセ―ジを変更したいcommitの先頭のpickをeditにしてエディタ終了。
// git rebase -i HEAD~3でメッセ―ジを変更して、--skipしたら最新のソースコードが消えて、以前のソースコードに変わってしまった。
git reflog   //実行履歴が出てくる。

git fetch    //remote repoからlocal追跡branchにコピー。 local branchに反映させる場合はfetch後mergeが必要。
git cherry-pick <commit_id> //別のbranchにある特定のcommitを自分のbranchにコピーする
git restore  //ファイル復元(試験的に追加)
git reflog   //HEADの移動履歴表示
git remote add <リモート名> <リモートURL>
git remote add origin <https://github.com/user_name/reposit_name.git> //localとremoteを結びつける
git remote set-url origin <url> // addはrmで消してからでないと使用できないが、rmで消さなくても変更できる。
git remote rm origin //error: remote origin already exists.が出たら消す。
git remote -v  //repository確認
// repositoryごとの設定config fileは/<local_repository_directory>/.git/config にある。
//しかしglobalはWindowsの場合、/Users/<user_name>/の下にある。 Linuxは~/.gitconfigか~/.config/git/configにある。
git config --global -l
git config --global https.proxy http://proxy._ _ _.co.jp:8080
git config --global core.editor "code --wait"  // git commit コメントエディタ
git config --global alias.ci commit  // エリアス作成 使用例 git ci
git config --global alias.st status  // エリアス作成 使用例 git st
git config --global alias.br branch  // エリアス作成 使用例 git br
git config --global alias.co checkout// エリアス作成 使用例 git co
git show // commitの内容を表示。 q で終了。
git hash-object file_name  // fileのhash ID表示
git cat-file -p HEAD //直前のcommitの内容を表示
git cat-file -p hashID //commitの内容からtreeのhashIDの先頭4文字を入れるとtreeに含まれる1階層分の情報を表示する


git lfs installo
//管理するファイルパターン指定
git lfs track "foo/bar/abc.png"   //ファイル名指定
git lfs track "foo/bar/*"         //ディレクトリ内のファイル一括管理
git lfs track "*.png"             //ファイルタイプ指定
git lfs track                     //全てのパタン一覧表示
git add example.png               //以下3行でLFS管理のファイルをbacklogへpush
git commit -m "add git lfs file"
git push
HEAD (Hashed Entity Attribute Data)とは
- Gitだけでなく他のrevision管理ソフトでも一般的に使われている呼び名で、
- 現在のブランチの現在のコミットの位置のポインター
- 各コミットはハッシュ値のIDを持っていて、HEADはそのハッシュ値IDをポインタとして持っている。
- 頭文字なので大文字でHEADと書くみたいです。
git pushでパスワードを聞いてきたら
パスワードではpushできなくなっています。 パスワードを聞かれたらtokenを入れなければなりません。 tokenは、GitHubのサイトで
- 『settings』をクリック
- 左のメニューの一番下くらいにある『Developer settings』をクリック
- 『Personal access tokens』をクリック
- 『tokens』をクリック
- 右上にある『Generate new token』をクリック
- Noteを記入(メモ)
- 期限『Expiration』を90 daysで設定
- Select scopes、私は全て選択しました。 この生成するtokenで実行できることの設定です。
- 一番下の『Generate token』をクリック
- 生成されたtokenをコピーしてメモ等にペーストして保存
- このtokenをgit pushした時聞かれるパスワードの部分に貼り付けて『Enter』でpushできます。貼り付けた時画面には何も表示されず、貼り付けたかどうかわからないのですが、ちゃんと貼り付けれていました。
fatal does not appear to be a git repository エラー
git pushでこのエラーが出た時、以下の方法で修正しました。
$ git config -l

// remote.origin.urlの部分を確認。 『:』が無いので『:』を入れて
remote.origin.url=git@github.com/###/###

remote.origin.url=git@github.com:/###/###
git@で始まる場合はgithub.comに続いて『:』が必要です。 https://で始まるときはgithub.comに続いく『:』は不要です。 私は、ここを間違えたのでこのエラーが出てきました。
configの場所
- globalは、 〜/.gitconfigファイルか~/.config/git/config
- ユーザー別は、 git initを実行したディレクトリ下の<project_directory>/.git/configファイル

コメント