
準備
Raspbianを更新
まず、Raspbian OSを更新。
- ~/$ sudo apt-get update
- ~/$ sudo apt-get dist-upgrade
必要ファイルのインストール
次に、必要となるファイル(dependencies)インストール。
- ~/$ sudo apt install libopenblas-dev libblas-dev m4 cmake cython python3-dev python3-yaml python3-setuptools
- ~/$ sudo apt-get install libavutil-dev libavcodec-dev libavformat-dev libswscale-dev
PyTorchのインストール
必要ファイルのダウンロード
下のサイトから
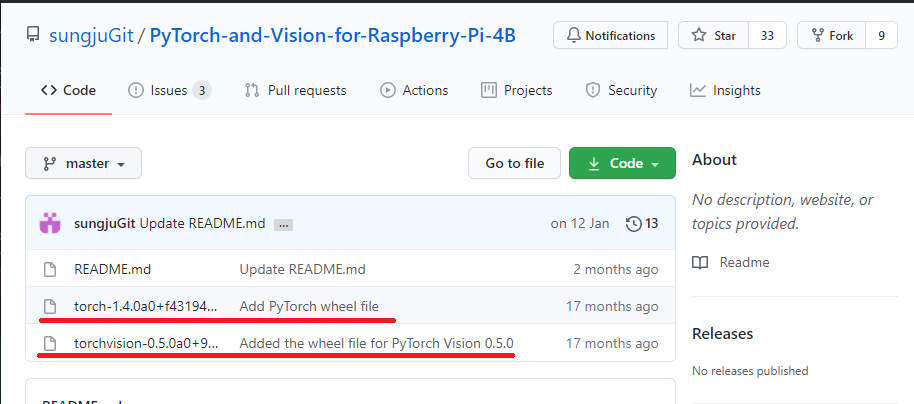
GitHub - sungjuGit/PyTorch-and-Vision-for-Raspberry-Pi-4B
Contribute to sungjuGit/PyTorch-and-Vision-for-Raspberry-Pi-4B development by creating an account on GitHub.
github.com
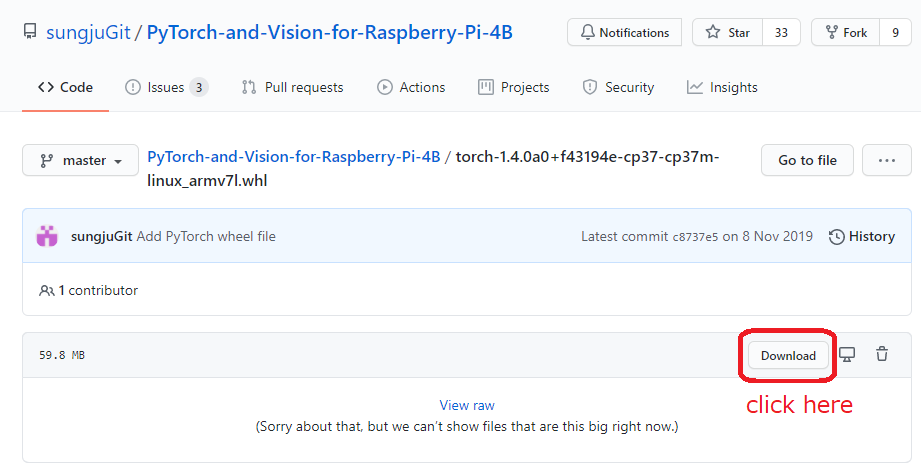
2つのファイル(下の図の赤線)をラズパイにダウンロード。 ファイル部分をクリックしたら、Downloadボタンのページに移動するので、Downloadボタンをクリック。
Downloadボタンをクリックしてダウンロード
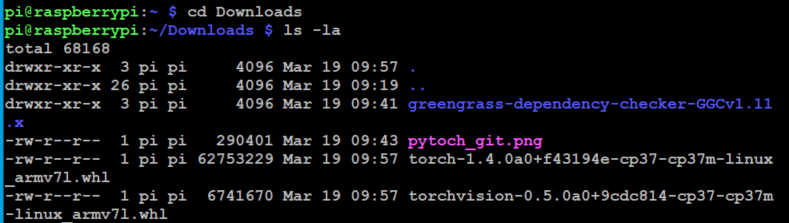
2つのファイルは共に~/Downloadsディレクトリにダウンロードされる。(私の場合、/home/pi/Downloads)
ファイルをダウンロードしたディレクトリに移動して、ダウンロードしたファイルがある事を確認。
PyTorchをインストール
そのディレクトリでtorch…のファイルを選んで, sudo pip3 installを実行。 30秒くらいでインストール完了。(注意:ダウンロードしたファイルが無いディレクトリでインストールしようとするとエラーになる。)

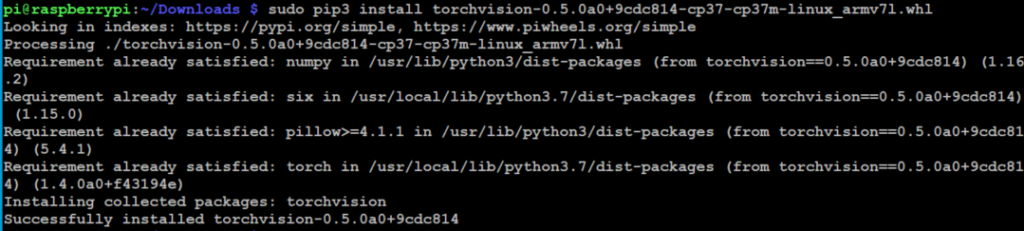
PyTorch Visionをインストール
今度は、torchvision…のファイルを選んで、sudo pip3 install を実行。 10秒もかからずインストール完了。
確認
import torch
import torchでエラーが出ないか確認

おまけ
最新バージョンのインストール(リンクのみ)
最新のPytorchをインストールする場合は、下のリンクの記載されています。 しかし、ビルドからしなければならず、8~10時間かかるかもしれないと書かれているので、私はビルドしていません。 でもビルドする場合は、1~2~4の順でするようです。

STEAM for Vision - PyTorch on Raspberry Pi
PyTorch is an open source machine learning library. It is widely used for applications such as computer vision and natur...
sites.google.com
Windows10へのインストール
pip install torch==1.7.1+cpu torchvision==0.8.2+cpu torchaudio===0.7.2 -f https://download.pytorch.org/whl/torch_stable.html
上記は下のリンクを参考にさせて戴きました。

【Python】Windows10にpytorchをpipでインストールする – Obenkyolab
obenkyolab.com

コメント