AWS IoT Web表示 その2 Amplify

(2024/9)

以下uBuntu22.04LTS向けに実施していきます。

プロジェクト、アプリケーション

  • Angular
    • ビルド前のソースコード群はプロジェクトと呼ばれます。 プロジェクトのルートdirectoryにはsrcディレクトリがあります。 srcの下にはappディレクトリがありますが、この場合のappはコンポーネントやサービスを入れておく場所です。
    • ビルド後はアプリケーションと呼ばれます。
  • Amplify
    • アプリケーションと呼ばれます。 

Angularではプロジェクトと言ったり、アプリと言ったりで、Amplifyでもアプリと言ったりややこしかったので記述しています。

準備:各Cliインストール

  • AWS Cliインストール
  • Angular Cliインストール
  • AWS Amplify Cliインストール
  • (後日再度実行する場合以下のUpgradeが必要かもしれない)
    1. nvm
    2. nodejs
    3. ng (Angular)
    4. aws cli v2
    5. Amplify

AWS Cliインストール

  • ~/aws/amplify/s3toweb/を作り、そのディレクトリで実行
  • AWS Access key IDとAWS Secrete Access KeyはAWSの初期設定でIAMで生成して保管していたのを使います。 まだない場合は『AWS Greengrass~DynamoDBやってみる その1 初期設定』の『IAM credential作成 (Access Key)』をご参照ください。
  • s3のbucketのlistが表示されたのでProxy経由でアクセスできています。
$ cd ~
$ mkdir -p aws/amplify/s3toweb
$ cd aws/amplify/s3toweb
$ curl "https://awscli.amazonaws.com/awscli-exe-linux-x86_64.zip" -o "awscliv2.zip"
$ unzip awscliv2.zip
$ sudo ./aws/install

$ aws --version
aws-cli/2.27.15 Python/3.13.3 Linux/6.8.0-52-generic exe/x86_64.ubuntu.22

$ aws configure
AWS Access Key ID [None]: AKIAZxxxxxxxxxxxxxxxxxxx
AWS Secret Access Key [None]: iQ3b8wBHxxxxxxxxxxxxxxxxxxxxxxxxxxLB/
Default region name [None]: ap-northeast-1
Default output format [None]: json

$ cat ~/.aws/config
[default]
region = ap-northeast-1
output = json
$ cat ~/.aws/credentials
[default]
aws_access_key_id = AKIAZxxxxxxxxxxxxxxxxxxx
aws_secret_access_key = iQ3b8wBHxxxxxxxxxxxxxxxxxxxxxxxxxxLB/

$ aws s3 ls
2023-12-11 13:05:17 mybucket-ichiri
2023-12-26 13:18:56 mybucket-tokyo-ichiri
2024-01-17 14:50:08 mybucket-tokyo-ichiri-ap-northeast-1-632952582714

// Upgrade方法
$ curl "https://awscli.amazonaws.com/awscli-exe-linux-x86_64.zip" -o "awscliv2.zip"
$ unzip awscliv2.zip
$ sudo ./aws/install --update
  • Proxyでエラーになったら~./bashrcに以下全部登録しておきます。 AWSはHTTP_PROXとHTTPS_PROXYだけでいいと思いますが、Gitやdockerやなんやらで小文字でないとだめとかFTPが無いと駄目とかあって面倒臭いので全部登録しています。
  • 私の場合、http://username:password@proxy-server:portの部分は『HTTP_PROXY=http://proxy.our_proxy_server.com:8080』な感じになっています。 私の場合は、username:passwordは不要でした。
export HTTP_PROXY=http://username:password@proxy-server:port
export HTTPS_PROXY=http://username:password@proxy-server:port
export FTP_PROXY=http://username:password@proxy-server:port
export http_proxy=http://username:password@proxy-server:port
export https_proxy=http://username:password@proxy-server:port
export ftp_proxy=http://username:password@proxy-server:port

Angularインストール

  • Angularにはnodejsとnpmが必要なのでnvmを使ってnodejsとnpmをインストールします。
  • Windows用のnvm-setup.exeをダウンロードして、管理者権限で実行します。
  • その後、Powershellでnvm list availableでインストール可能なnodejsバージョンのリストが表示されるので、LTSの一番新しいバージョンでインストールしま。
  • インストール後、nvm lsでインストールされているバージョンの一覧が表示されるので、nvm useに先ほどインストールしたバージョンを指定して使用を開始します。 nvmで操作しないと古いバージョンのnpmで実行されるとangularをインストール出来ない事もあります。
  • nodejsとnpmのバージョンが正しくなっているか確認します。
  • その後、またまたnpmにProxyを設定するのと、npmjsレジストリを設定します。 私の場合は、username:passwordは不要でした。 .bashrcにもproxy設定して、npm configにもproxy設定する必要があります。 またregistryはhttpsだけでは駄目でした。 httpも設定するとangularをインストールできました。
  • また会社Windows PCの場合は、在宅勤務用のソフトProxy Zscalerが入っていることもあるのでこの設定も必要です。 その場合は、追加でnpm configへのZscaler proxy設定と、pemファイルにZscaler Root CA証明書の内容を追加して環境変数のNODE_EXTRA_CA_CERTSへパスを設定する必要があります。『Windows npm Fetch Error Zscaler 使用時の解決方法』をご参照ください。 
  • そしてやっとangularのインストールです。
    • npm install -g @angular/cli
    • (注意:angularをインストールした後、nodejsをバージョンアップするとangularはnode_modules/.binに配置されるのでngコマンドを認識しなくなります。)
$ nvm --version
0.40.3
// Version upは以下を実行。 その後シェルを再起動。
// 使用可能VersioNはhttps://github.com/nvm-sh/nvm で確認
$ curl -o- https://raw.githubusercontent.com/nvm-sh/nvm/v0.40.3/install.sh | bash

$ nvm list available
$ nvm install 22.15.1
$ nvm ls
$ nvm use 22.15.1
$ node
Welcome to Node.js v22.15.1.    <------ちゃんと選択出来ていますね。
>                     <-----Ctrl+C を2回してexitします。
$ npm --version
11.3.0                <------npmも新しいですね。
//Linuxの場合の、npmのupgrade方法。 Windowsは異なる。
$ npm install -g npm@latest
$ npm config set proxy http://username:password@proxy-server:port
$ npm config set https-proxy http://username:password@proxy-server:port
$ npm config set registry "http://registry.npmjs.org/"
$ npm config set registry "https://registry.npmjs.org/"

$ cd ~/aws/amplify/s3toweb
$ npm install -g @angular/cli
added 265 packages in 46s

49 packages are looking for funding
  run `npm fund` for details

$ ng version

     _                      _                 ____ _     ___
    / \   _ __   __ _ _   _| | __ _ _ __     / ___| |   |_ _|
   / △ \ | '_ \ / _` | | | | |/ _` | '__|   | |   | |    | |
  / ___ \| | | | (_| | |_| | | (_| | |      | |___| |___ | |
 /_/   \_\_| |_|\__, |\__,_|_|\__,_|_|       \____|_____|___|
                |___/


Angular CLI: 19.2.12
Node: 22.15.1
Package Manager: npm 11.3.0
OS: linux x64

Angular:
...

Package                      Version
------------------------------------------------------
@angular-devkit/architect    0.1902.12 (cli-only)
@angular-devkit/core         19.2.12(cli-only)
@angular-devkit/schematics   19.2.12 (cli-only)
@schematics/angular          19.2.12 (cli-only)

//ngのVersion Up方法。 global指定で一旦アンインストールしてから再インストール
$ npm uninstall -g @angular/cli
$ npm install -g @angular/cli@latest
//そしてプロジェクト内のAngular関連パッケージのアップデート。 プロジェクトディレクトリに移動して以下実行。
ng update @angular/cli @angular/core

AWS Amplifyインストール

3分強かかりました。

$ npm install -g @aws-amplify/cli
npm warn deprecated inflight@1.0.6: This module is not supported, and leaks memory. Do not use it. Check out lru-cache if you want a good and tested way to coalesce async requests by a key value, which is much more comprehensive and powerful.
npm warn deprecated rimraf@3.0.2: Rimraf versions prior to v4 are no longer supported
npm warn deprecated glob@7.2.3: Glob versions prior to v9 are no longer supported

$ npm install lru-cache
$ npm install rimraf@10
$ npm install rimraf@5
$ npm uinstall -g @aws-amplify/cli
$ npm cache clean --force

//
$ npm uninstall -g @aws-amplify/cli
$ npm install -g @aws-amplify/cli
$ amplify -v
13.0.1
//依存ライブラリのVersionが古いとWaringが出たので以下を実行して、各ライブラリのバージョン確認
$ npm audit fix
$ npm view glob version

nodejs version up

$ nvm ls-remote --lts
$ nvm install 22.15.1
$ nvm ls   // インストールしたバージョン一覧と現在使用のバージョン確認
$ nvm use 22.15.1   // Version指定して切り替える方法

開始

(以下は17.x.x)の例

  • ngはAngularアプリ用のディレクトリを作ってくれるので、その親ディレクトリに移動して
  • Angularを作成 アプリ作成
  • アプリ名は何でも構いません。 ここでは『amplify-angular-app』としました。
  • Autocompletionは入力補完機能を使用する事を聞いてきていて便利なのでyesにします。(19.2.12では効いてこなかった)
$ ng new amplify-angular-app
 Would you like to enable autocompletion? This will set up your terminal so pressing TAB while typing Angular CLI commands will show possible options
and autocomplete arguments. (Enabling autocompletion will modify configuration files in your home directory.) yes
Appended `source <(ng completion script)` to `/home/ichiri/.bashrc`. Restart your terminal or run the following to autocomplete `ng` commands:

    source <(ng completion script)

Would you like to share pseudonymous usage data about this project with the Angular Team
at Google under Google's Privacy Policy at https://policies.google.com/privacy. For more
details and how to change this setting, see https://angular.dev/cli/analytics.

   no
Global setting: disabled
Local setting: No local workspace configuration file.
Effective status: disabled
? Which stylesheet format would you like to use? CSS             [ https://developer.mozilla.org/docs/Web/CSS                     ]
? Do you want to enable Server-Side Rendering (SSR) and Static Site Generation (SSG/Prerendering)? no
CREATE amplify-angular-app/README.md (1078 bytes)
CREATE amplify-angular-app/.editorconfig (274 bytes)
CREATE amplify-angular-app/.gitignore (587 bytes)
CREATE amplify-angular-app/angular.json (2642 bytes)
CREATE amplify-angular-app/package.json (1051 bytes)
CREATE amplify-angular-app/tsconfig.json (1012 bytes)
CREATE amplify-angular-app/tsconfig.app.json (424 bytes)
CREATE amplify-angular-app/tsconfig.spec.json (434 bytes)
CREATE amplify-angular-app/.vscode/extensions.json (130 bytes)
CREATE amplify-angular-app/.vscode/launch.json (470 bytes)
CREATE amplify-angular-app/.vscode/tasks.json (938 bytes)
CREATE amplify-angular-app/src/main.ts (250 bytes)
CREATE amplify-angular-app/src/index.html (303 bytes)
CREATE amplify-angular-app/src/styles.css (80 bytes)
CREATE amplify-angular-app/src/app/app.component.css (0 bytes)
CREATE amplify-angular-app/src/app/app.component.html (19903 bytes)
CREATE amplify-angular-app/src/app/app.component.spec.ts (955 bytes)
CREATE amplify-angular-app/src/app/app.component.ts (315 bytes)
CREATE amplify-angular-app/src/app/app.config.ts (310 bytes)
CREATE amplify-angular-app/src/app/app.routes.ts (77 bytes)
CREATE amplify-angular-app/public/favicon.ico (15086 bytes)
✔ Packages installed successfully.
hint: Using 'master' as the name for the initial branch. This default branch name
hint: is subject to change. To configure the initial branch name to use in all
hint: of your new repositories, which will suppress this warning, call:
hint:
hint:   git config --global init.defaultBranch <name>
hint:
hint: Names commonly chosen instead of 'master' are 'main', 'trunk' and
hint: 'development'. The just-created branch can be renamed via this command:
hint:
hint:   git branch -m <name>
Author identity unknown

*** Please tell me who you are.

Run

  git config --global user.email "you@example.com"
  git config --global user.name "Your Name"

to set your account's default identity.
Omit --global to set the identity only in this repository.

fatal: unable to auto-detect email address (got 'ichiri@PC-.(none)')

(19.2.12の場合)

  • ng new amplify-angular-appとすると (実際は新しいアプリ『angular-fp0h-rag』とした)
  • CSS,SCSSのどれにすると聞いてきたので、私はSCSSを選択
    • SCSSは変数や分岐が使えて、デザイン性や動的Webに向いている
    • コンパイルが必要で、最終CSSに変換される
    • CSSを知っていたら学習しやすい
  • Server-Side-Renderingにするかどうか聞いてきたので、DefaultのままNoとした。
    • SSRが有益なのはSEOが非常に重要なECサイトやマーケティングサイト
    • SSRが良くないのは、リアルタイム性を求められるサイト(チャット、ゲームなど)

  • Angularのファイルが生成されましたね。
  • Author identity unknownとあるので、Runの下に表示されているように以下を実行。
  • そしてAutocompletion(予測候補)を有効にする為、ターミナルを再起動せずに、source <(ng completion script)を実行。
$ git init
$ git config user.email "ichir@email.com"
$ git config user.name "ichiri"

$ source <(ng completion script)

取り合えずここまででおしまい。 『その3』でコードを書いていきます。

amplify cliを使って色々やってみたがDeploy方法が分からず、結局『その3』以降で実行したようにビルドしたローカルのAngularのファイル群をzipにして、AWS Amplifyコンソールを使ってUploadしてDeployしました。

多分Amplifyの設定で『手動』としたのでそうなったのだと思います。

Amplify

  • アプリ名のディレクトリに移動してamplify configureを実行して環境設定します。
  • この際にWebブラウザでAWSのルートユーザーでログインしなければなりません。
$ cd amplify-angular-ap

$ amplify configure

$ amplify status   //プロジェクトの状態確認
$ cat amplify/team-provider-info.json   //設定状況確認
  • 続いて、Amplifyで初期化します。
  • Project nameは、英数字のみで『-_』等の記号は使えません。 私は『s3towebAmpAng』としました。
  • App TypeでJavaScriptと表示されますが、AngularがJavaScriptベースのアプリを構築する事と言っています。 Angularなので記述はTypeScriptですがビルドするとJavaScriptになるからです。 
  • Authentication methodは『AWS profile』です。 AWS profileを選択すると、上記のAWS Cliで入力してAccess key IDとAccess secrete key情報を使ってAmplifyのアクセスが出来るようになります。
  • amplify initでsrc/app/aws-export.jsが生成されます。
$ cd amplify-angular-app
$ amplify init
Note: It is recommended to run this command from the root of your app directory
? Enter a name for the project s3towebAmpAng
The following configuration will be applied:

Project information
| Name: s3towebAmpAng
| Environment: dev
| Default editor: Visual Studio Code
| App type: javascript
| Javascript framework: angular
| Source Directory Path: src
| Distribution Directory Path: dist
| Build Command: npm run-script build
| Start Command: ng serve

? Initialize the project with the above configuration? Yes
Using default provider  awscloudformation
? Select the authentication method you want to use: AWS profile

For more information on AWS Profiles, see:

Configuration and credential file settings in the AWS CLI - AWS Command Line Interface
You can save your frequently used configuration settings and credentials in files that are divided into named profiles.
? Please choose the profile you want to use default Adding backend environment dev to AWS Amplify app: d3of7jk86pirg0 Deployment completed. Deploying root stack s3towebAmpAng [ ==========------------------------------ ] 1/4 
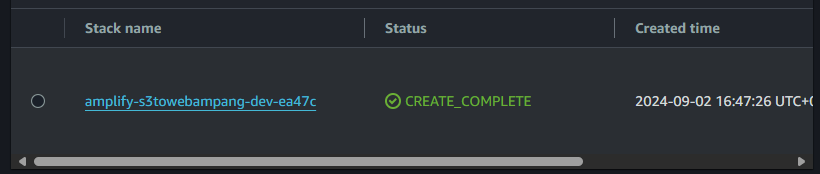
amplify-s3towebampang-dev-ea4… AWS::CloudFormation::Stack CREATE_IN_PROGRESS Mon Sep 02 2024 16:47:26… AuthRole AWS::IAM::Role CREATE_IN_PROGRESS Mon Sep 02 2024 16:47:29… DeploymentBucket AWS::S3::Bucket CREATE_COMPLETE Mon Sep 02 2024 16:47:44… UnauthRole AWS::IAM::Role CREATE_IN_PROGRESS Mon Sep 02 2024 16:47:29… ✔ Help improve Amplify CLI by sharing non-sensitive project configurations on failures (y/N) · no You can always opt-in by running "amplify configure --share-project-config-on" Deployment state saved successfully. ✔ Initialized provider successfully. ✅ Initialized your environment successfully. ✅ Your project has been successfully initialized and connected to the cloud! Some next steps: "amplify status" will show you what you've added already and if it's locally configured or deployed "amplify add <category>" will allow you to add features like user login or a backend API "amplify push" will build all your local backend resources and provision it in the cloud "amplify console" to open the Amplify Console and view your project status "amplify publish" will build all your local backend and frontend resources (if you have hosting category added) and provision it in the cloud Pro tip: Try "amplify add api" to create a backend API and then "amplify push" to deploy everything

IAM Roleが作成されてましたが、Permissionは何も付加されてませんでした。

s3 bucketも勝手に生成されてしまいました。

CloudFormationのStackが生成されてました。

  • 上記で生成されたs3はdevelopment用で別にs3bucketを作らないといけないみたいなので作ってみました。
  • Authを追加します。 Coginitoを使います。
  • Default configutation
  • Usernameでサインイン
  • Advanced settingはNo
  • ちょっと意味が解ってないけどリソースに名前を付ける見たいなので『s3toWEB』とした
  • Bucket名は『mybucket-tokyo-ichiri-s3toweb』。 コマンド実行時にも名前を書いたけど、エラーも出なかったけど無視されたのかな? まあいいや、続けよう。
  • Auth ユーザーとGuestユーザーの両方のアクセス許可します。
  • Authユーザーは全て選択
  • Guestユーザーはreadだけを選択
$ amplify add storage mybucket-tokyo-ichiri-s3toweb
? Select from one of the below mentioned services: Content (Images, audio, video, etc.)
✔ You need to add auth (Amazon Cognito) to your project in order to add storage for user files. Do you want to add auth now? (Y/n) · yes
Using service: Cognito, provided by: awscloudformation

 The current configured provider is Amazon Cognito.

 Do you want to use the default authentication and security configuration? Default configuration
 Warning: you will not be able to edit these selections.
 How do you want users to be able to sign in? Username
 Do you want to configure advanced settings? No, I am done.
✅ Successfully added auth resource s3towebampang51eb8fe1 locally

✅ Some next steps:
"amplify push" will build all your local backend resources and provision it in the cloud
"amplify publish" will build all your local backend and frontend resources (if you have hosting category added) and provision it in the cloud

✔ Provide a friendly name for your resource that will be used to label this category in the project: · s3toWEB
✔ Provide bucket name: · mybucket-tokyo-ichiri-s3toweb
✔ Who should have access: · Auth and guest users
✔ What kind of access do you want for Authenticated users? · create/update, read, delete
✔ What kind of access do you want for Guest users? · read
✔ Do you want to add a Lambda Trigger for your S3 Bucket? (y/N) · no
⚠️ Specified resource configuration requires Cognito Identity Provider unauthenticated access but it is not enabled.
✅ Successfully updated auth resource locally.
✅ Successfully added resource s3toWEB locally

⚠️ If a user is part of a user pool group, run "amplify update storage" to enable IAM group policies for CRUD operations
✅ Some next steps:
"amplify push" builds all of your local backend resources and provisions them in the cloud
"amplify publish" builds all of your local backend and front-end resources (if you added hosting category) and provisions them in the cloud

  • ~/aws/amplify/s3toweb/amplify-angular-app/amplify/backend/storage/s3toWEBが生成されてた。
  • その下に./buildがありその中に2つのファイルが生成されていた
    • cloudformation-template.json
    • parameters.json
  • この段階ではs3に『mybucket-tokyo-ichiri-s3toweb』bucketは生成されていなかったが、『amplify push』が成功したらそのbucketが生成される。 (mybucket-tokyo-ichiri-s3towebはparameters.jsonに記載されている)
  • 『amplify push』実行。 
  • Are you sure you want to continue? (Y/n)で『y』と入力。
  • 完了してプロンプトに戻るまで5~6分かかった。
$ amplify push
✔ Successfully pulled backend environment dev from the cloud.

    Current Environment: dev

┌──────────┬───────────────────────┬───────────┬───────────────────┐
│ Category │ Resource name         │ Operation │ Provider plugin   │
├──────────┼───────────────────────┼───────────┼───────────────────┤
│ Auth     │ s3towebampang51eb8fe1 │ Create    │ awscloudformation │
├──────────┼───────────────────────┼───────────┼───────────────────┤
│ Storage  │ s3toWEB               │ Create    │ awscloudformation │
└──────────┴───────────────────────┴───────────┴───────────────────┘
✔ Are you sure you want to continue? (Y/n) · yes

Deployment completed.
Deploying root stack s3towebAmpAng [ =============--------------------------- ] 1/3
        amplify-s3towebampang-dev-ea4… AWS::CloudFormation::Stack     UPDATE_IN_PROGRESS             Tue Sep 03 2024 13:37:14…
        storages3toWEB                 AWS::CloudFormation::Stack     CREATE_IN_PROGRESS             Tue Sep 03 2024 13:37:17…
        auths3towebampang51eb8fe1      AWS::CloudFormation::Stack     CREATE_COMPLETE                Tue Sep 03 2024 13:37:53…
Deployed auth s3towebampang51eb8fe1 [ ======================================== ] 6/6
        UserPoolClientRole             AWS::IAM::Role                 CREATE_IN_PROGRESS             Tue Sep 03 2024 13:37:22…
        UserPool                       AWS::Cognito::UserPool         CREATE_COMPLETE                Tue Sep 03 2024 13:37:24…
        UserPoolClient                 AWS::Cognito::UserPoolClient   CREATE_COMPLETE                Tue Sep 03 2024 13:37:26…
        UserPoolClientWeb              AWS::Cognito::UserPoolClient   CREATE_COMPLETE                Tue Sep 03 2024 13:37:26…
        IdentityPool                   AWS::Cognito::IdentityPool     CREATE_COMPLETE                Tue Sep 03 2024 13:37:28…
        IdentityPoolRoleMap            AWS::Cognito::IdentityPoolRol… CREATE_COMPLETE                Tue Sep 03 2024 13:37:31…
Deployed storage s3toWEB [ ======================================== ] 8/8
        S3Bucket                       AWS::S3::Bucket                CREATE_COMPLETE                Tue Sep 03 2024 13:37:36…
        S3AuthPublicPolicy             AWS::IAM::Policy               CREATE_COMPLETE                Tue Sep 03 2024 13:37:54…
        S3AuthUploadPolicy             AWS::IAM::Policy               CREATE_COMPLETE                Tue Sep 03 2024 13:37:54…
        S3AuthProtectedPolicy          AWS::IAM::Policy               CREATE_COMPLETE                Tue Sep 03 2024 13:37:54…
        S3GuestPublicPolicy            AWS::IAM::Policy               CREATE_COMPLETE                Tue Sep 03 2024 13:37:54…
        S3GuestReadPolicy              AWS::IAM::Policy               CREATE_COMPLETE                Tue Sep 03 2024 13:37:54…
        S3AuthPrivatePolicy            AWS::IAM::Policy               CREATE_COMPLETE                Tue Sep 03 2024 13:37:54…
        S3AuthReadPolicy               AWS::IAM::Policy               CREATE_COMPLETE                Tue Sep 03 2024 13:37:54…

Deployment state saved successfully.

s3にもbucketが生成されて、

開発用Bucketのamplify-s3towebampang-dev-ea47c-deployment/studio-backendにs3toWEBフォルダができた。

s3://amplify-s3towebampang-dev-ea47c-deployment/studio-backend/storage/s3toWEB/build/parameters.json

AWS AmplifyのコアライブラリとAWS AmplifyのAngular用UIコンポーネントライブラリをインストールします。

$ npm install aws-amplify @aws-amplify/ui-angular
npm notice Beginning October 4, 2021, all connections to the npm registry - including for package installation - must use TLS 1.2 or higher. You are currently using plaintext http to connect. Please visit the GitHub blog for more information: https://github.blog/2021-08-23-npm-registry-deprecating-tls-1-0-tls-1-1/

added 176 packages in 47s

153 packages are looking for funding
  run `npm fund` for details

警告が出たので、以下の様に変更しました。 『その1』で最初はhttpsで設定してたけどnpm installが実行できずにhttpに変更して設定したらnpm installが通ったのでそのままにしていました。 しかしhttpsに変更してnpm install実行すると警告が出なくなりました。 httpsとhttpで2~3回切り替えてnpm installを実行して確認してみました。

$ npm config set registry https://registry.npmjs.org/

PROXY設定は、私の会社の場合はPROXYまでの内部接続はhttpなので.bashrcのHTTPS_PROXY設定もnpm configのhttps-proxyも両方httpで設定しています。 しかし上記のエラーはProxyからnpmレジストリまでの接続はhttpsでないとダメと言ってると思います。 なのでnpm config のregistryにはhttpsでアクセスするという事です。

その他 課金 確認

Home ConsoleのCost andなぜかLambdaの課金がかかるようになっていたので、毎日s3にCostReportDaily.csvをチェックして、Unblended Costの列で課金されていてProductCodeでサービスを調べるとLambdaのでした。

使用金額は、USD1.6469E-06で他のs3での金額は-07とか-08とかだったので、Lambdaの使用料が一桁多くなっていたのでグラフの大きな割合を占めていました。 中身を調べると何故かNorthern Virniniaにデータ転送をしています。 多分、Amplifyが何か自動的に作ったのでしょう。

$0.09 per GB – Asia Pacific (Tokyo) data transfer to US East (Northern Virginia)

まあ10万回使って、USD0.16と金額が小さいので、2~3日様子を見てみます。

同様にs3に入ってきているxxxxx-aws-cost-allocation-2024-09.csvファイルを見ると、その月内で何のサービスでいくら課金されるかを見れます。 CostBeforeTaxの列に記載されていて、0であればまだ課金されないという事です。 そしてUsageQuantityを見たらどのサービスでどれだけ使ったか分かります。

コメント